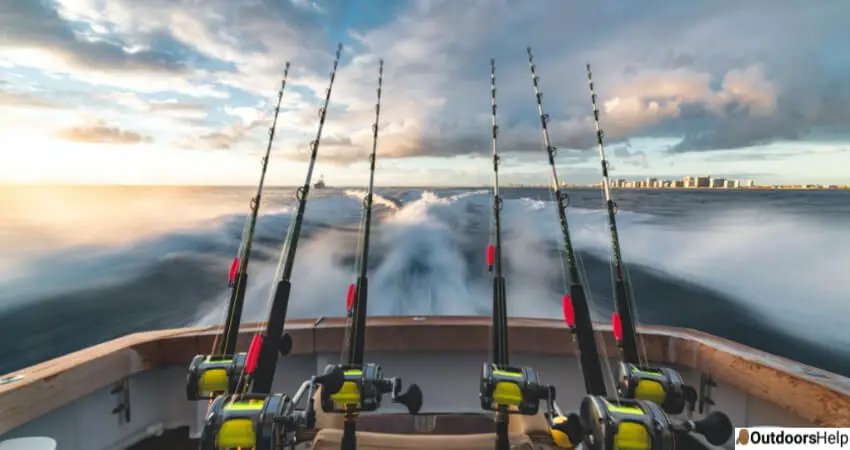
RuneScape 3 Deep-sea fishing update is now live. It is a Fishing activity that you gain accessibility by speaking to Goomah in the Fishing Guild, then select “Travel”. It is open to players from level 68 fishing (level required to enter into the Fishing Guild), which enables you to engage in fishing activities in the Deep Sea Fishing hub. I will share some fantastic new ways to train fishing skills.
The Deep-Sea Fishing Hub is connected to the Fishing guild and offers various ways to earn a Fishing experience. The Deep Sea Fishing Hub is located far off the banks of Gielinor. Here are multiple ways to gain experience in fishing.
Swarms – Level 68:
The Deep Sea Fishing Hub is located in the South West Corner. You can click here once to catch fish from Mackerel to Sailfish without changing the fishing spot. However, sometimes a fish gets stuck in your net, and you have to start fishing again. The particular fish that are caught here depends on your level of fishing. While at level 85, you could catch sailfish (level 97), they are much less likely to see them closer to their level than other fish. A magic fishing net, which can act as a safe deposit box, is just a little north of the swarm.
Minnow Shoal – Level 68:
Two fishing spots are just south of the Deep Sea Fishing Hub. These spots contain magnet shoals that need to be caught without bait. Magnetic minnows stack your inventory to make them an excellent choice for AFK. These are baited for magical fishing spots, unlike other fish that have been caught. The conversion of every bait requires three hundred magnets, up to 3 groups at a time. Please click Right and select “Good” as clicking left will eat one rather than creating bait. You can use the boat that you have arrived at as a bank chest if you have to access your bank for some reason.
Jellyfish – Level 68/91:
There are 9 Jellyfish fishing spots in the central northern region of the Deep Sea Fishing Hub. Some of these 9 are Green Blubber Jellyfish (Level 68), while others are Blue Blubber Jellyfish (level 91). Jellyfish sometimes be electrified in either colour. You will buy a debuff stack when you catch electrified jellyfish. If/when the stack reaches 10, you are stunned (free of freedom) and unable to catch fish until your cooldown timer is over.
Note that this timer normally takes approximately 2 minutes. However, if you try to catch another electrified gelding, it will reset and stun you again before it can be completely clear. You can cut it down by Deux piles for each typical jellyfish caught if your debuff pile has not reached 10, which does not lower your cooldown time after it has been amazed.
Magical Fishing Spot – Level 79:
You can find magic fishing spots in various places around the Deep Sea Fishing Hub. You must throw bait into the water, made by the Magnetic minnows. It will make it a temporary place of choosing fishing, depending on the bait. Manta ray, Sea Turtle, and Great White Shawk are options (bait). The spot will take about 50 fish to restart again, ready for a bit, to a Magical fishing spot.
Fishing Frenzy – Level 94:
The fishing hub is located at the Fishing Frenzy activity on the west side of the Deep Sea. You won’t receive items in your inventory but gain a hefty bit of experience in the game, earning you the highest possible xp/h.
The idea is to continue flying fish in the giant net from the neighbouring fishing grounds. For each cleared fishing place, you earn one strip (it will vanish). Continuously fishing will earn you +1% of the experience for every decade.
Note that to achieve that, you only have to click on the fishing spots. Click one, wait until it vanishes, click another, repeat. Although your range can be far above 200, your boost will be 20%. If you stop fishing for six seconds, you cut your string in half, and your bonus will decrease unless you catch fish and become inactive again. This will not reduce. However, if you lobby, it will completely reset. The higher your level of fishing, the higher your rate of success. The “Frenzied” achievement will be completed with a streak of 200.
Sailfish – Level 97:
There are three sailfish spots on the North-East side of the Deep Sea Fishing Hub. One of these spots is usually a Swift location for sailfish. It means that you catch them more than regular fishing spots. But the spot is moving more frequently. Sometimes a Calm sailfish spot can be found, which does the other thing – the spot will last longer, and you’ll catch the fish more quickly. A bank is moderately convenient to the Magical Net just west of the Jellyfish spot.
Events:
Several random events may take place during your time at the hub. You will often experience titles and objects by interacting with them, although some come at a price. All these occur between the jellyfish, the fishing swarms and the Crow’s nest in a large water area.
Deep-Sea:
Specific measures to achieve a fishing boost depend on these events. More people are more likely to be successful at one of these events. World 116 is your best chance of success (the Deep Sea fishing hub).
Jellyfish Invasion:
In the open patch of water, a giant jellyfish will spawn. There are several jellyfish on the paths around the docks. You will have to click on jellyfish, severally, to clear them in 2 waves. The successful eradication of the jellyfish invasion will give you a fifty per cent increase in fishing experience for 30 minutes.
Sea Monster:
You will spawn a sea monster, and you will either throw raw (from your inventory or bank) fish crates to the seaside monster to feed it. It is best to feed the Crates of redfish with the Sea monster as it heals 2000 and is free. They are not always available, however. Higher fish fill the monster of the Sea when you are to wear your fish, so throwing Thunas will feed it only for a couple of hundred points, while throwing a Sailfish feeds more than 2,000. Feeding successfully enough will give you a 10% chance of getting an additional catch for 30 minutes. If you change the world, this time will fall to 10 minutes.
Whale:
A whale spawns and keeps her mouth open. Your mission is to save the whale swallowed fisherman. To do this, you must fish the magnet from the mouth of the whale. If the fisherman succeeds in freeing himself, you will get a 10 per cent increase in fisheries rates for 30 minutes, which will reduce him to ten minutes if you change the world.
Travelling Merchant:
Sometimes in the open water area, a ship appears. You can buy things from your shop by interacting with them. Four items are always to be purchased. The first item is always a map of the island, while the other three items change at reset daily. Please note that only once daily can you buy every item, even if you meet the trader. Buying any item will complete the “Up for Sail” achievement.
Whirlpool:
In the open surroundings, a whirlpool can spawn. There are two ways to interact with it. Firstly, you can fish from it and get different catches according to your level of fishing. Second, you can toss coins with a right-click. They will be taken off the game, and you will earn one out of five titles according to how much you donated in all. Everybody will have a deep-sea Fishing buff for 30 minutes when 10 million or more coins are donated, and this time will be reduced to 10 minutes when the wave is changed. These include: Titles won:
| Donation | Title |
| 1-10 million | Name: (The Wishful) |
| 10 to 100 million | Name: (The Generous) |
| 100 million to 1 billion | Name: (The Millionaire) |
| 1 to 5 billion | Name: (The Charitable) |
| 5 billion and above | Name: (The Billionaire) |
Throwing in at least one coin will complete the “Make A Wish” achievement
Other Activities:
A few smaller activities may take part as well as the fishing and random events at the Deep Sea Fishing Hub. Some people will make you feel, while others are just for fun.
Achievements:
There is a total of 7 different achievements to be completed at the hub. These include:
| Task | Description | RuneScape Points | Notes |
| Boosted animal | Have all deep-sea boosts active at the same time. | 20 | See our Boosts section of the guide for how to attain these. |
| Fancy Turtle-Back | To Interact with the deep-sea treasure turtle | 5 | |
| Frenzied | To obtain the most significant boost that is available in the ‘Fishing Frenzy’ activity. | 20 | |
| Make a Wish | This entails that you throw coins into the deep sea whirlpool. | 5 | Any amount of gold thrown into the Whirlpool will complete the achievement process, though various amounts facilitate the award of multiple titles. |
| My Precious! | Locate and return Gregg ‘Groggy’ Herring’s missing ring | 10 | The ring is found at random during fishing, and Greg is situated at the Deep Sea Fishing Hub at the Crow just west of the entry boat. |
| Ruler of the Sea | Complete all deep-sea encounters. | 20 | |
| Sea Monster | |||
| Jellyfish | |||
| Whale | |||
| Up For Sail | Buy an item from the deep sea travelling merchant. | 5 |
Boosts:
You can meet various items while in the Deep Sea Fishing Hub and get yourself enhanced for several minutes. Bear in mind that one of the above achievements will complete all three boosts simultaneously.
| Item | Boost | Duration |
| Barrel of bait | 10% chance for an extra catch | 3 minutes |
| Broken fishing rod | 10% bonus catch rate | 3 minutes |
| Tangled fishing bowl | 5% extra Fishing experience | 3 minutes |
| Message in a bottle (Deep Sea) | Your choice of boosts above | 5 minutes |
Captain Deathbeard:
Occasionally Captain Deathbeard rows around to ask for instructions. You gain some experience from your interactions with him.
Fishing Notes:
You might find a page of fishing notes while fishing. If you examine them, you will disappear from the page, and you will have up to 9,703 fisheries.
Gregg’s Ring:
You will get the Gregg ‘groggy’ herring ring once when you fish. This ring must be returned to Gregg. It is in the next west of the Crow on the Deep Sea Fishing Hub entrance boat; you must look up to see him but can hurl up at the ladder. Unfortunately, returning his ring will not encourage him to be less drinkable, but he will change the reason he drinks, and you will complete the achievement of “My Precious!.”
Minnowman:
The Minnowman sometimes spawns close to the Deep Sea Fishing Hub and goes south to the Minnow Shoes. As he walks, he asks for any extra minutes; each time, the amount varies. When he leaves, you get an Expert Return of up to 1,940 if you give him the appropriate Magnetic Minnows. It will just take about 2 minutes for the minnowman.
Pelican:
A Pelican sometimes spawns in the hub. You can feed it from your stock to gain a little experience.
Seagull:
While there are seagulls throughout the dock, sometimes there is a special one. You can click on the Seagull specifically to shoot it; its squawking will best identify it. Be aware that, like all the other seagulls, you can’t come near it too close. You’ll gain a little experience by shooting it away.
Seasinger:
Seasinger sometimes spawns and starts to serenade one of the people on the docks. You could be this person, another player, or even the nearby fishers. You can click here when she sings to you to hear her song. Another person nearby can then start to serenade. When she leaves, up to 1,940 people gain a little experience. Be aware it may not spawn super close to you, and your chat window will not reflect her singing.
Treasure Turtle:
Sometimes a turtle with a chest on her shell spawns in the open air of the water. You will receive a treasure trial prize to the elite level through interaction with the turtle. You might also earn a clue scroll if you were on the world as soon as it spawned. The “Fancy Turtle Back” achievement is completed by interacting with the turtle. Note that using good luck enhances your chances of getting a better lot.